Pages

Sunday, December 18, 2016

Event Horizon Design Update

In the past few weeks, I have overhauled almost every aspect of Event Horizon with the goal of making it more robust (Silent Spring proof). Hopefully, this will give a good overview of what I changed.

Drum

The drum is where most of the issues from the original design originated. Here are the changes made:
  • Added pin between sleeve and motor mount piece: This should prevent these two pieces from rotating in unfortunate ways and shearing the wires.
  • Added internal steel nut strip: If the teeth get ripped out, it won't trash the drum (as much). The nut strip also acts as a keyway for the piece attached to the output of the motor.
  • Removed clamping piece for motor output and replaced with a plate bolted to the face of the motor: The primary motive for this was reducing weight, but it also leaves more space inside of the drum for other modifications.
  • Moved idler bearing from drum to frame: Making those press fit pieces was a pain.
  • Added retaining rings and washer to idler shaft: This constrains the bending of the frame by putting the drum in tension when the two main frame pieces are pushed apart. I believe this will help prevent Silent Spring-induced explosions.
  • Switched to a shielded bearing for the motor side: The open bearing got filled with dirt and other crap, which made it very stiff. It is best to avoid having the bearing filled with dirt.
  • Added a nub in the frame piece that matches the wire cutout in the motor mount sleeve: This constrains the rotation of the drum and prevents it from pulling its own wires out as in the Gemini match at FI.
  • Switched to a continuous steel blade for a tooth: It is inset into the drum and should be much tougher. I may not bother with this if I don't have enough time to do the machining.
Washer added to the idler shaft
Keyway nub to prevent rotation
The internals of the drum
Full render of everything

Drive Base

Most of the changes to the drive base were aimed at weight reduction. Changes made:
  • Switched to brushless motors: They are lighter and should be faster. I'm planning on using these: https://hobbyking.com/en_us/turnigy-park300-brushless-outrunner-1380kv.html
  • Back wheel is no longer direct drive: This improves the space situation and some reduction is probably necessary for the new motors.
  • Front and back wheels are now different sizes: Improves packaging.
  • Aluminum hex hubs are switched for nylon: Weight savings.
New wheel configuration


Frame/ Armor

I made a lot of changes to the frame aimed at improving strength.
  • Re-worked front plate mounting: Should be less prone to screws ripping out, etc.
  • Extended belly pan forward: This will brace the frame further toward the front, helping to prevent the main plates from buckling.
  • Switched from finger joints to pins to locate center plate: Fewer giant cutouts = less bad things.
  • Moved belly pan holes: I moved holes to places that do not have as many holes, rather than just ignoring their existence. This should reduce the likelihood of catastrophic failures of the frame members.
  • Reduced angle of side armor: I did not find myself needing it at all at FI and the weight savings are probably worthwhile.
  • Removed middle armor support: The fewer holes the better and, again, I didn't really need the side armor.
  • Switched to aluminum top plate: It should be stronger (and look better) and I think I have the weight.
The new system for the front corners
What the inside looks like now (I didn't bother modeling the motors)

Extended belly pan and holes strategically placed to avoid other holes

Other Thoughts:

Hopefully I will be able to manufacture this over winter break. While there are changes that I probably will not get around to, I suspect this version will be much more competitive than the last. Some experimental things, like the brushless motors may end up not working, in which case I will switch them out for more known quantities.

Sunday, October 9, 2016

Franklin Institute Competition Post Mortem

I have been looking to compete in a combat robotics competition for a while, and my schedule and robot state finally lined up for the Franklin Institute NERC event (FI) this year. I spent the week before the event on the CNC and lathe making spare parts in anticipation of some likely failure modes.

My father and I took a train from Boston to Philadelphia Friday night before FI, and arrived at 4:30 am Saturday morning in a fairly sleep deprived state.  After waiting around in the train station for a few hours, we walked to the venue (about a mile) and checked in.

Event Horizon went through safety inspection without issue and weighed in at 3 lb. 0 oz. Over the course of the next few hours, the pit area filled up completely. All in all, around 80 bots were present in the various weight classes.

Match 1: Silent Spring vs. Event Horizon


When the bracket was posted, I found that EH was against Jamison Go's Silent Spring for its first match. Silent Spring is an exceptionally well built and high energy undercutter and for all intents and purposes, it is indestructible. I knew this would be a hard match, and that it would likely result in a significant amount of damage.

The match started with a few very violent hits that sent the bots to opposite sides of the arena. During the first of these hits, Silent Spring's disk sliced through the bottom of EH's left front armor brace, leaving it touching the ground, and eliminating my ability to drive straight. Despite this, I was able to keep the drum facing Silent Spring for two more large hits. Looking back on the match video of this match is interesting as there is a clear difference between the hits where the majority of energy came from EH's drum and the hits where the energy came from Silent Spring's disk. 
Damaged front armor brace

In the end however, Silent Spring hits the corner of EH's front right armor support plate, ripping it off. This spins EH slightly, and Silent Spring's disk tooth connects with the inside of the now unsupported side plate, causing it to buckle at the point where the first screw connects the bellypan to the side plate, which lines up with a large cutout for the center armor plate support, causing a huge concentration of stress. It appears that the screw that holds the drum to the side plate came loose due to a combination of vibration and a small number of threads being engaged, so when the side plate buckles, the drum is unseated. The still-spinning drum then hits the floor or Silent Spring's blade, causing it to jump back, dig into the frame cross brace, and be shot from the robot due to its large stored energy. I was quite confused about exactly how this happened until watching the video repeatedly in slow motion.

While this looks like fairly complete destruction, I found that many vital parts of the robot, such as the motors and electronics, were still fully functional. Since I had CNCed an entire spare set of frame members and brought the old drum, the repair process was actually fairly straight forward.

Silent Spring damage
Aside from the obvious complete disassembly, the drum itself sustained a significant amount of damage, with one screw ripped out, one shattered, and one bent at a severe angle. Moral of the story: Aluminum is too soft for this application.


Matches 2&3: <3 Winning by Default

I was able to complete the reassembly process before my next match because of the large number of bots at the event and the resultant long break periods. It turned out that this did not matter much as EH's opponents for its second and third fights did not show up, so it won by default.

Match 4: Hard Drive vs. Event Horizon

My next actual match was against Hard Drive, a bot with some sort of low power vertical spinner and a wedge.

Hard drive has exposed wheels and I was able to knock one off fairly quickly. Before I could knock the second one off, however, the set screw that holds on the back (driven) wheel on one side came loose, and left me without one drive side. EH won the match, but not as spectacularly as I would have liked.

After the match, I put Loctite on the set screws and then put the drive train back together.

Match 5: Gemini vs. Event Horizon


After beating Hard Drive, EH was up against Gemini, a double sided wedge bot. The match started off good, although I accidentally spun up the weapon too fast and flipped the bot over. I was able to get one good hit before the screw that holds the weapon on came loose and the wires spun around, pulling one of the connectors out and turning off the weapon. I tried to push Gemini around after that, but the robots are pretty much matched in pushing power and EH lost to a judges decision.

Thoughts

EH's issues in the last two matches were relatively minor and can be easily fixed by proper fastening methods (pins) in the next version.

The structural issues uncovered by Silent Spring are more troublesome as they necessitate a significant redesign of the frame. Since the bot is at weight, this is difficult.

The drum easily has enough energy to be effective and might very well have been the highest energy drum at the event.

The frame did a good job of taking impacts dealt by the drum.

The robot did not drive particularly well. It was not fast enough and the turning was too sensitive.

The drum tooth system needs a major redesign to make it multi-use.

Planned Changes

I am going to make the frame much stronger by eliminating stress concentrations and move the drive base to brushless motors to free up more internal space. This should make it possible to reduce the length of the bot and thereby reduce weight. If I can, I will use an un-geared brushless motor mounted on the outside of the frame rails to maximize internal space for electronics. I will also extend the belly pan forward on the sides to provide additional bracing.

Regardless of what I eventually do with the motors, I am going to move all wheels to dead axles.

I also need to add full front armor to better protect against spinners with sharp teeth.

On the drum, I plan to add nut strips on the inside to anchor the screws and switch to alloy steel flat-heads. The nut strip will also double as a keyway to prevent all drum pieces from spinning. The motor hub piece will be pinned to the frame so that it can not rotate.

Thursday, September 15, 2016

A New Drum Motor for Event Horizon

Rather than re-build the drum in the same configuration that failed initially, I decided to modify the motor mounting to make it more robust. This was achieved by replacing the giant stock mounting plate with a mounting piece that is actually the right size.

Now that I have a large lathe, my design of simple round pieces has changed from Computer Aided Design to Lathe Aided Design.
The final motor mounting piece.
This piece is tapped and has the mounting pattern of the motor. I drilled the mounting holes using the old mounting plate as a guide, which seems to have been effective. 
This slips inside a sleeve, which has a slot for the wires and is the right diameter for the bearing and frame holes. A single screw tightens it onto the frame, which should be sufficient to take the relatively minimal torque that this will see. Best of all, however, the sleeve is large enough diameter to cover the heads of the screws attached to the motor, which should prevent them from falling out.

The motor mounted to the frame side.
Everything fit together nicely, and I was able to spin the drum up successfully. The 3/4" bearing seems to have picked up some dirt (because it is open), which has added friction. I will probably replace it with a shielded bearing eventually.

Event Horizon, mostly reassembled.

As you can probably see, I have not yet re-machined the drum to take care of the screw that was ripped out. This picture also shows the new fastening system for the drum motor (the screw sticking out of the frame). If this design does not self-destruct, I probably will not bother making the hub motor that I was considering previously.

Thursday, September 8, 2016

Some testing on Event Horizon and why I need to use Loctite

One of the single greatest factors in making a combat robot successful is durability.

With this in mind, I decided to do some testing on Event Horizon. I spent some time looking for large and relatively solid objects to hit, and finally settled on the EH 1.0 carcass with a large chunk of scrap aluminum in it to make it heavier.

I found that running into EH 1.0 slowly with the weapon at full speed produced only small impacts, which would not be sufficient in an actual match, so I rammed it at full speed. The EH 1.0 frame flew three to four feet, which is much more in line with the power that I want from the EH 2 weapon (Sorry, no video, I can't drive and take video at the same time).

Upon initial inspection, EH 2 appeared not to have sustained damage in the impact, but after looking closer, I noticed that one of the teeth (1/4-20 flat head cap screws) had been completely ripped out of the 1/4" thick aluminum drum. Also, the drum did not spin freely anymore, and the wires for the motor had been partly sucked inside of the drum.


I took apart the drum.

... and was confronted with a scene of absolute destruction. The motor mounting plate was completely deformed, and the wires for the motor (all three of them) had been completely sheared off. Interestingly, all of the screws that hold the motor mounting plate to the hub were missing, and the threads on the hub were completely intact, showing no signs of an impact. Thus, we reach the title of this post: As far as I can tell, the screws fell out at some earlier point, meaning that the drum motor had been solely held in place by its wires. When the drum hit the EH 1.0 frame, it seems that the motor flexed somewhat and the mounting plate caught on the inside of the drum somehow, bending the plate and shearing the wires. Using loctite and/ or jam nuts might have prevented this failure. Thankfully, this is an easy fix since I have another motor.
Yes, that hole was round once.

As a backup, I am also going to start development of a hub motor using the parts from the broken motor. More on this later.

Sunday, August 21, 2016

Event Horizon Part 2: Machining and Electronics

The machining of Event Horizon started with a large amount of work on the CNC router. I cut all of the UHMW pieces first, then cut the aluminum side plates and the bottom plate. UHMW cuts very easily on the router. All UHMW was cut with a single flute 1/8" endmill. Aluminum pieces were cut with an aluminum cutting router bit (one of these).

Preparing to cut the side pieces


Some of the pieces completed.
I had not actually cut 7075 aluminum on the router before, and it basically consists of dumping lots of flood cooling onto the piece continuously and hoping that nothing breaks.
The bottom plate after machining
I assembled all of the router pieces, which generally fit well. The grooves in the back piece were not quite wide enough and I had to file them out slightly. This is because the UHMW stock is actually slightly thicker than 3/8", which is a common problem with UHMW.
Initial assembly of the frame


Next was the machining of the drum pieces. I did most of this with the big lathe, which I attached a quick change tool post to. The first drum piece was the drum itself.

I started by cutting the stock roughly to length using the horizontal bandsaw, and then faced off the ends to the correct length.

Drum end being faced down

Drum stock cut to length and polished with fine grain sand paper
I initially planned to drill the holes on the mill with the small rotary table, however, after fixturing the piece initially, I realized that the small rotary table does not even come close to holding large parts straight. Additionally, the locking mechanism that allows the chuck to tilt is not strong enough to allow me to drill the holes farthest from the chuck jaws without slipping. I thought of three possible solutions to this: 1) put a block under the drum piece at the end 2) buy a lathe chuck for the big rotary table 3) drill the holes with the drum piece held in the vise. I decided to go with option 3 since blocking the piece up would not solve the issue of the chuck being off center, and buying a lathe chuck for the big rotary table would be expensive. I used a height gauge and the small rotary table to mark the end of the drum every 60 degrees and then clamped the drum piece in the vise, using a parallel block as a stop. The parallel block doubles as a point of alignment for the marks on the drum, allowing me to drill the holes at 60 degree intervals with good accuracy.

Drum piece clamped in the vise


After the completion of the drum, I made the two bearing rings and the motor mounting hub. This required several hours of machining on the lathe since all three pieces have the majority of material removed from the original piece of stock. I also machined the axle piece for the free-spinning side of the drum.

Completed drum piece and motor mounted to motor hub
I managed to break not one, but two 4-40 taps off in the bearing ring for the 3/4" bearing, which means that I have to leave two of the six screws out. This is fine for now, but I will probably re-make the piece at some later point.

Frame with drum attached

At this point, the majority of work was done on the bot and I just had to finish up a few minor parts. The first of these parts were the armor support blocks, which back the front half of each aluminum armor plate. I cut these pieces from some leftover EH 1 frame stock and beveled them on the mill.

My solution to putting beveled edges on things
Next, was finishing off the drive train. I finally got around to generating G-code for cutting the pulley blanks (the pulleys have a hex bore and I don't have a hex broach), and CNCed four, which I then added grooves to on the lathe. I also machined hubs for the front wheels from some pieces of aluminum hex shaft. The hubs were a little rough while spinning on the shoulder bolts, so I put a little spindle oil on the shoulder bolts, which solved the issue. I also made the disk for connecting the motor to the drum, which I cut from the same piece of UHMW sheet that the frame came from.
EH with completed drum, side armor supports, and front wheels attached
Aside from the top plate, the bot was mechanically done. I weighed it with electronics, and found that it was ~5-6 oz. over weight, which is a lot.  I removed the side armor braces, drilled holes in the frame side plates and enlarged some of the holes on the drum (also useful as vent holes for the motor). The side armor pieces should be unnecessary against all robots but powerful horizontal spinners. Hopefully, the angle of the armor will be sufficient to deal with these types of robots. After looking over the electronics system, I realized that the drive motor controller that I weighed the robot with is actually an ounce heavier than the two Vex Motor Controller 29's that I was planning to use, which helped as well. These changes brought the weight down to a more manageable 3 lb. 2 oz, so I started working on the electronics.

I have not yet mentioned the control system for this bot, so here it is:
  • Drive controllers: modified Vex Motor Controller 29 (2x)
  • Weapon: HobbyKing 40A ESC
  • Radio: HobbyKing 6 channel radio
  • Battery: E-Flite 3S 1300 mAh LiPo
  • Power Switch: FingerTech Mini Power Switch
I started by removing the casing of the Motor Controller 29's and cutting off the connectors. I then removed the casing from the ESC and soldered the V_in wires of the 29's to the ESC board where the power wires are attached. This allows me to eliminate the ground wires running to the receiver from the drive motor controllers, saving some weight and reducing the number of wires cluttering the inside of the bot. I cut down the output wires of the motor controller 29's, and soldered on the bullet connectors, then taped everything together in a small block. Before competing, I will make a second block for a quick replacement should anything in the electronics system decide to spontaneously combust.
Electronics block soldered together and mostly completed
I finished the electronics system by adding the battery connector, PWM connectors, and power switch, then stuffing everything into the rather limited space between the motor and the inside frame member.
Electronics system mostly installed
With the electronics system now complete, I finished the top plate and assembled the full bot.
Completed bot
In all, the weight came out to 3 lb. 1.3 oz. I should be able to cut the remaining excess weight by changing the top and bottom plates to garolite and polycarbonate, and if necessary, lightening the middle armor support blocks substantially.


And, of course, here is some testing footage:

EH is more maneuverable than it looks in this video. I am just bad at filming and driving at the same time.

I noticed a few things while testing today that could be problematic:
  1. The weapon can spin up fast enough to flip the bot over on startup, then send it shooting across the floor. This is why you see me spinning it up slowly in the video. I might be able to use this for self righting, which would be very useful.
  2. The turning speed is very limited when the weapon is at full speed because the gyroscopic forces cause the bot to tip and ground out on the side armor.
  3. One of the front wheel axle bolts came loose. I will need to loctite everything in place before competing.
  4. I now need to make a testing box.

Saturday, August 13, 2016

Event Horizon Beetle Weight Combat Robot Part 1: Design

Some Background:

My interest in combat robotics goes back many years. When I was in middle school, my father brought home a few books on the subject and I was enthralled. I thought up a few ideas, and had some vague plans to some day build a robot. And then I joined FRC 3467 and my combat robotics ambitions were superseded by FRC. A little over a year ago, after becoming frustrated with the state of the FRC team, I began looking for alternative robotics competitions. At some point, I started designing combat robots again (probably had something to do with the renew of Battlebots). Originally, my robot was supposed to be a 30 pounder, but as I started filling out those designs, I realized that it would be too expensive for my limited budget. Eventually I settled on a UHMW unibody 3 lb. drum spinner and created the first iterations of Event Horizon (EH). Since then, EH has gone through numerous revisions and two of those revisions have reached the point of being made.

CAD of the entire EH line may be found in this GrabCad folder: https://workbench.grabcad.com/workbench/projects/gcvuOsckFDIWLJdoowpnEofy4OMchZ2VH8DeKmusFdmL7P#/space/gcvl1rrfAIgrpm1Xv3alz6UXAZ9_w34lScfgpi5XAR6gS5
(Note: I re-arranged my GrabCAD projects and this link is broken now. I'll update it when it's fixed)


Event Horizon V1:

I quickly abandoned the unibody aspect of EH after concluding that my manual milling skills were not sufficient to actually make the frame. The design progressed to finger-jointed UHMW plates. After a fairly lengthy design process, I finally bought parts and machined EH 1 over winter break last year.

The frame of EH 1
Here is the completed frame of EH 1. The large chunk missing from the front of the right side plate was a milling mistake on my part. I can only imagine how horrible the results would have been had I tried the unibody.
Here is EH 1 fully wired and functional. I added wheel guards on at some point after these pictures were taken.

This is about as far as the EH 1 design got. I intended to compete with it at Motorama 2016 but Motorama 2016 fell on the last weekend of the 2016 FRC build season and as the design lead, I could not justify being gone at such a critical point in the season. EH 1 floated around my room waiting for me to find it a competition. But that didn't happen before I decided to re-design it.


Event Horizon V2/2.1:

Once the FRC season ended, several things had changed: 1) My father bought a CNC router, 2) I had spent a lot more time using the Bridgeport, 3) I had an internship at Foxx Life Sciences. These factors meant that I now had vastly expanded machining resources and money to throw at expensive robotics projects, which obviously meant that I was going to take on another robotics project.
After completing and testing EH 1, I was immediately somewhat dissatisfied with it. The weapon did not store enough energy. It was light, small diameter, and low speed. And so, a new robotics adventure began: make a robot with a really big weapon.
EH 2 began as a completely separate design from EH 1 and heavily utilized the CNC router. It used a strange drive train setup involving offset wheels for the ability to drive upside-down. It also used inverted motors, which I eventually deemed too space inefficient and changed. The front was a wedge, which was primarily designed for fighting wedge bots. (This is the Event Horizon v2 and Event Horizon v2.1 folders in GrabCad) I was about to order parts for EH 2.1 when I started having second thoughts. The odd wheel configuration was a liability as a spinner could easily take off the belts, the wedge probably did not have sufficient down force because of the wheel position, and the weapon motor was exposed and asking to be forcibly removed. Instead of buying parts for EH 2.1, I briefly tried to remedy the issues in EH v2.2, then scrapped the design and started over.

Event Horizon V2.3:

Frame:

For the next version of the Event Horizon design, I started with a more conventional wheel setup, using four 1 5/8" Bane Bots wheels, two on each side of the bot. The back set is direct driven off of two KitBots 1000 rpm gear motors (leftover from EH 1). The front set is driven via pulleys off of the back set. The smaller wheels and four wheel setup should make EH 2.3 slightly slower and easier to control than EH 1. Unlike EH 2.1, 2.3 has angled 7075 aluminum side armor, which is supported by UHMW blocks, and a UHMW plate in the front section to absorb spinner hits. The frame also has two ears at the top to prevent the drum from touching the ground should the bot be flipped over. Rather than the offset wheel arrangement of EH 2.1, 2.3 has an angled section on its top plate that exposes the wheels when the robot is flipped over. The front of the EH 2.3 frame is flat, which is not good for wedges. If I have weight left over after everything is assembled, I will add removable wedgelets of some sort to the front and may also make a set of removable ablative armor blocks for spinners.


Weapon:

For this version, I finally put the weapon motor inside of the drum (a result of getting the Hendey Lathe). Originally, I was going to disassemble the motor and machine a new housing for it to interface with the drum, but after receiving the motor, I realized that it would be easier to simply mount the entire motor  inside of the drum without modification. This has the additional benefit that it will make the motor much easier to replace if I manage to break it. The motor has a free speed of around 15,000 rpm at 11.1 V, which is fast enough that I don't yet feel the need to re-wind it (a boost converter may happen at some point, though). Initially, the drum had a titanium shaft running through it. This change in motor setup makes a through-shaft impossible and forced me to use separate hubs on each side of the drum. Hopefully this will not cause the frame to bend in after repeated hits. If it does, I will have to switch back to the original design.
When I first designed EH 2.3, it used a steel drum with steel bars welded on as teeth. I actually ordered the stock for this design, but since I don't know how to weld, I switched to an aluminum drum with flat head screws as teeth. I may go back to the welded steel drum at some point in the future, but for now, I want to get the bot up and running. You can see the various drum and motor designs in the EH 2.3 GrabCad folder. Common to all of the drum designs is an inset hub on each side of the frame. This is because the frame is made from UHMW, which is very soft. Repeated impacts on a small shaft would likely dent in the UHMW and cause issues over time. 
To protect the drive base, the frame pieces have some nubs on the bottom, which should bottom out as the wheels compress during a hard hit.

That's it for my summary of the Event Horizon design process. EH 2.3 is now in its final stages of machining. I will post a writeup of that when it is completed.

Saturday, July 30, 2016

Moving the Hendey Lathe

Intro:


A few weeks ago, one of my father's co-workers, Dave, decided to sell his 12" Hendy Lathe. I had been wanting a larger lathe for a robotics project, and at only $400, this was a superb deal.

After doing a bit of research, I determined that the lathe was made between 1887 and 1917, making it over 100 years old. Mostly due to the price, we decided to go to look at it.

We made the 45 minute drive to Groton, Mass and were immediately struck by the size. I had been expecting a large machine, but this basically took up the entire back of a garage bay. Upon inspection, everything appeared to be in remarkably good condition. Most importantly, all of the ways and bearings looked to be un-damaged. It also came with two four jaw chucks, a three jaw chuck, and two plates, which appear to attach to the spindle in place of a chuck (my father theorizes that these have largely been replaced by rotary tables/ CNC machines). One plate and one chuck appeared to be from a larger lathe, perhaps an 18" machine. We attempted to try turning a piece, however, the ancient flat belt snapped almost immediately, so we headed home to make a final decision. From looking around the shop, I determined that we did, in fact have space, as long as we relegated my father's crap to the attic made some organizational changes. We decided to buy the lathe.

I spent the remainder of the weekend rearranging everything in the shop, which was something I had been intending to do for a while, but never got around to.

Transportation:

 Transporting a 1500 lb. piece of steel is not exactly an easy task.

We left around 10:00 and rented a UHaul trailer, which was rated for a few thousand pounds. We towed the trailer with my mother's Honda CRV to Dave's father's house, which was we were picking up the lathe and arrived around 12:00.

Disassembly commenced immediately and everything that could be easily removed (motor, tailstock, etc.) without moving the machine was taken off and put outside for the time being. We then used a jack to lift one of the legs and a pry bar to rotate the machine so that it was facing out the garage door. Pete, a friend of Dave's showed up with a pickup truck, and he backed the trailer into the garage. Next, we jacked up the lathe under the bed and removed the leg closest to the door, backed the trailer partly under it and used two 6x6's as a set of rails on which to roll steel pipes. We tied straps from the bed to the rails of the trailer to prevent the machine from tipping and I used a come along to pull it into the trailer. Once it got close to the end, we removed the other leg and finished pulling it in. We tied from several points on the bed to the (somewhat under-sized) tie down points in the trailer with straps to prevent sliding during transit.

Pete towed the trailer with his truck (the CRV trailer hitch is only rated to tow the trailer empty...) and we drove to my house. We backed the trailer under the car lift that we have in our shop and using a large strap and a 2x4 wedged between the rails of the bed, we lifted from the center of mass and pulled the trailer out.
It was now around 10:00 pm and after 10 hours of moving, we lowered the lathe down on the 6x6's and called it a night.

Lathe in the position we used to lift it out of the trailer


In the morning, my father and I lifted the lathe up, set it down on a pair of blocks (actually, the stand for the drill press), and re-attached the legs.

Lathe with legs on, still attached to car lift and on blocks.


We lifted it up slightly again, pulled the blocks out and lowered the entire machine down onto a set of carpet sliders, which were a last minute purchase. The carpet sliders turned out to be a great idea and it was fairly simple to just push the lathe into position. We used a bottle jack to prop up the legs side at a time when it was in place in order to pull the carpet pieces and sliders out from underneath it.

Lathe while removing carpet sliders.

Cleaning/ Reassembly


The rest of the day was dedicated to cleaning/ reassembly.

Lathe at the end of the day.

We cleaned the ways and rods, and removed the thick layer of grime on all of the handles.


 The lathe makes the Bridgeport mill look small... This was kind of a disturbing effect after having the mill dominate the corner since we got it a couple of years ago.


Later in the week, we got the pulley on.  There was still quite a bit more cleaning to go, however, and we were waiting on a McMaster order to come in with alligator lacing for joining the flat belt so that we could actually run it.


After getting the alligator lacing, we finally got it running. I fixed the tailstock locking mechanism, too. It seems that the cam that locks the bottom piece was slightly out of alignment.

This will be an ongoing project as there are lots of small improvements that can be made, such as attaching the extra quick change tool post that we have lying around. For the moment, however, my focus is going to shift to a few other projects that I have been neglecting, such as my new beetle weight combat robot, Event Horizon (Actually, Event Horizon V2, but more on that later).

Wednesday, July 20, 2016

Long Trail Thru Hike 2015

LT 2015 Thru-Hike Journal
Eric Chin
I compiled this Journal as I hiked, usually writing at night, unless I didn’t remember to, in which case I wrote in the morning.  This copy is transcribed from my paper journal with minor editing for the sake of readability/ clarity.  My full thru-hike took 18 days, starting on 7/30/15 and ending on 8/16/15, and had 2 resupplies.  I was resupplied by my mother, who planned to day hike the VT 4000 footers this summer anyway in an effort to complete the 67 NE 4000 footers. She also met me at Battell Shelter and Killington in the process of her hiking.  I predominantly stayed in shelters during my hike and only used my tent twice.  My trail name was Sprout because I was 16 and people seemed to find it amazing that I was doing a solo thru-hike at that age.


Itinerary:
Day 1: Williamstown, MA to Melville Nauheim
Day 2: Melville Nauheim to Story Spring
Day 3: Story Spring to Spruce Peak
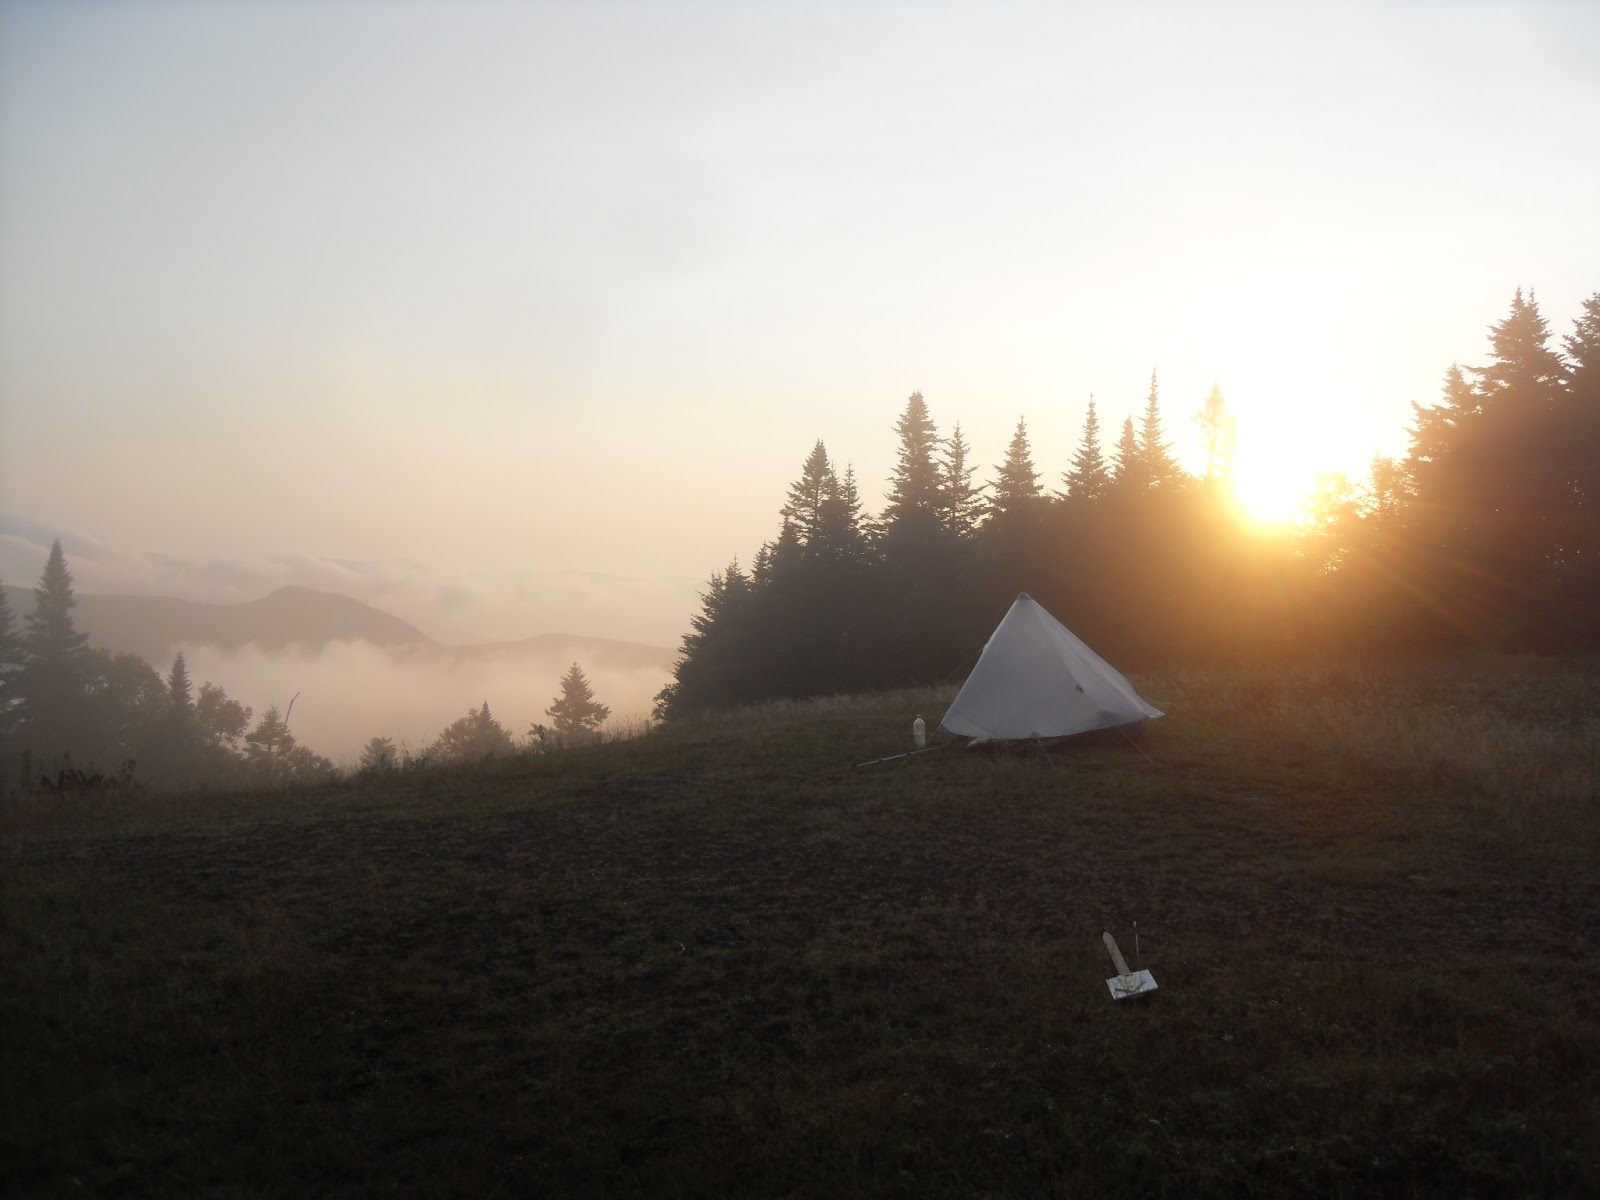
Day 4: Spruce Peak to Big Branch
Day 5: Big Branch to Clarendon
Day 6: Clarendon to Route 4 (resupply)
Day 7: Route 4 to Sunrise
Day 8: Sunrise to Skyline Lodge
Day 9: Skyline Lodge to Battell
Day 10: Battell to Cowles Cove
Day 11: Cowles Cove to Route 2 (resupply)
Day 12: Route 2 to Taylor Lodge
Day 13: Taylor Lodge to Taft Lodge
Day 14: Taft Lodge to Bear Hollow
Day 15: Bear Hollow to  Corliss Camp
Day 16: Corliss Camp to Tillotson Camp
Day 17: Tillotson Camp to Uller’s Dream ski trail
Day 18: Uller’s Dream ski trail to Journey’s End Rd.
7/30/15
I started the day on the Pine Cobble Trail in Williamstown, MA after staying at the Villager Motel, which is near the trailhead last night, and did the largest climb of the day up to the VT border. From there, the trail was relatively flat the rest of the day up until the last 3 miles.  I stopped for water at Roaring Branch and Congdon Shelter, where there were two people when I arrived.  On my way up Harmon Hill, A number of people I passed were looking for the shelter, so it’s probably quite busy tonight.  After Harmon Hill, there was a punishing descent and a fairly steep ascent up to Melville Nauheim Shelter.  Just half an hour before I reached the shelter, it started Pouring, so I put on my rain coat, however, I did not close the pit zips, so the rain ran down my arms and saturated the inside of the coat sleeves.  I was regretting my late breakfast and start time.  At the moment, there are a few other people at the shelter. Hopefully no more show up.


7/30/15 (later)
A few more people showed up, but two left.  I finally looked at my feet… not enough mole-skin.


8/1/15 (morning, I forgot to write 7/31)
I went over Glastenbury yesterday.  I thought that it was 7 miles to Goddard Shelter for some reason, but it was actually 8.5, so I was wondering why it was taking so long. I met two guys at Kid Gore Shelter who also went to Story Spring.  Someone was snoring last night and this morning Redwood (LT nobo) traded me a bar for a pair of earplugs.  There were 5 people in the shelter last night and many more tenting/ hammocking/ sleeping on the ground.


8/1/15 (later)
I left around 7:00 this morning and met Redwood on the way to Stratton Mtn. He had a resupply in town and was going to take the gondola down, so I decided to go as well.  We got burgers at a restaurant in town. They were good but expensive (14 dollars for a burger and drink, no fries).  When we finished eating, I went back up the gondola and he went to go find his resupply package. As soon as I got to the top, the gondola closed for a thunder storm. I am waiting for the storm to pass at the top of the gondola with a bunch of tourists and Redwood is still at the bottom.  It’s 1:00, so I may not go all the way to Spruce Peak today as I had planned.


8/1/15 (night)
I waited out the thunder storm and headed down.  It was amusing to listen to the tourists complain about how they’d left the windows in their cars and houses open.  I got to Stratton Pond around 3:00 and decided to head on.  The trail was quite muddy and one person I passed heading south was hiking in crocs. After the trail going to Douglas Shelter, there was a road walk and I stopped for 20 minutes at Prospect Rock before heading on to the shelter.  I got to the shelter around 6:00 and made dinner.  My instant stuffing was mush, so I need to reduce the water next time.  The shelter has 4 or 5 AT sobos, Redwood, who unexpectedly showed up around 7:00, and me.  The blisters have not gotten significantly worse.

8/2/15
I got up around 6:30, made breakfast and left around 7:30.  I made good time over to Bromley Shelter, where I filled water bottles.  There were several AT nobos there, one of whom had broken his finger when his hiking partner stepped on a bog bridge at Stratton, which flipped up as he was going to step on it.  Everyone left at about the same time, so there was a crowd up at the summit also.  There was a middle aged couple giving out food at the top (day hikers), and I got a snickers bar, while the first few people up got apples and the last few got Hershey bars, It was much appreciated, but if I had known, I would have left the shelter earlier for an apple.  It was a great view and the food was a plus.  There was a good view from Styles Peak as well as an array of large dragon flies flying around the clearing at the top.  There was no view from Peru Peak, which was disappointing. The rest of the day went by fairly quickly and I made short stops to rest my feet at all of the shelters as well as Baker Peak, which had an interesting view.  I finally arrived at Big Branch shelter around 5:00 and considered stealth camping along the trail, but decided not to.  I went down to the river and soaked my sore feet and washed off the the day’s mud.  I am the only one in the shelter, though a number of people are camped along the trail from here to the bridge.


8/3/15
I started from Big Branch around 7:00 and saw some turkeys near the trail in the woods on the way to the trailhead before Little Rock Pond.  I stopped at the pond in the morning, then at White Rocks, which had a great view. The cairns near the junction were quite interesting.  I did not take the side trail to Greenwall Shelter.  There were various other views throughout the day, but none were quite as good.  The rest of the day was tough ascents and descents (at least after 4 nearly 20 mile days).  Much of the trail up Bear Mtn. passed through former fields and pastures, so there were few rocks and the trees were all fairly young.  The young trees made the ascent up Bear Mtn. hot and sweaty. I stayed at Clarendon lookout until some dark clouds came in.  It started raining just as I arrived at the shelter.  There are a bunch of people here tonight.


8/4/15
I was the second person out from Clarendon Shelter today and passed the Moons (an AT nobo couple) early in the day.  They must have stealth camped somewhere along the trail.  I got to Governor Clement Shelter fairly early and stopped for a break.  Governor Clement Shelter is quite unusual.  It is made of stone and has a fireplace.  There was a black and white photograph in the front of the shelter that shows the shelter in the middle of a field soon after it was built, however, there is no sign of a field there now.  The Moons caught up to me again at the shelter and I soon headed up Killington, which was not as tough as I expected.  I nearly ran out of water on the ascent because I was only carrying a liter, but found a small spring next to the trail going up Little Killington from which to filter water.  I reached the summit of Killington before noon and waited for a while until my mom and brother showed up.  There were many tourists at the top who presumably rode the gondola up. After my mom and brother arrived, they ate lunch and then we went back to Cooper Lodge, which appeared to be in terrible shape.  I took the LT to Route 4 at Sherburne Pass while they took the shorter route.  Not long into the hike down from Killington, I started to hear thunder in the distance and picked up the pace.  I averaged roughly 3 mph on the way down.  My mother picked me up and after taking showers, we all went to Rutland to look for some new insoles for my shoes, more moleskin, and dinner.  It appears that there are no sporting goods stores or restaurants (other than Chinese food and pizza) in Rutland, so we went to Walmart to buy moleskin and insoles, which did not end up working with my shoes. We went up the Killington access road for dinner, then came back to the lean-to that we reserved at Gifford Woods State Park for the night.  Tomorrow, my mom and brother will head home, and I will resume the trail at Sherburne Pass where I left off.


8/5/15
This morning, my mother cooked scrambled eggs and sausages for breakfast.  They were delicious and a welcome change from granola and powdered milk.  After breakfast, I finished re-packing my pack and my mother dropped me off at the trail.  The hike to Maine Junction was uneventful, though I did see a deer, which ran off into the woods as I approached.  On the way to Rolston Rest, there was an area near the trail that was being logged and I could hear chainsaws and a skidder off in the woods.  I stopped at Rolston Rest for a break, then continued on.  The trail leading up to David Logan Shelter was long and slow and had no views.  I stopped at David Logan Shelter, where a summer camp group was camped.  They were amazed by my age and the fact that I was doing nearly 20 mile days.  I was quite tempted to ask if they would sell me the “extra” fresh fruit that they were trying (unsuccessfully) to distribute fairly. I filled up my water and headed on to sunrise shelter.  The trail was very flat and my feet were beginning to grow sore by the time I reached the shelter.
At my resupply, I picked up my second trekking pole, which I used today.  The poles seem to have reduced the stress on my knees and feet, but also reduced my pace slightly.  I think this is a reasonable tradeoff and thus, will continue using the poles.


8/6/15
At 16 miles, today was my shortest day so far.  I am still feeling the distance despite the trekking poles and reduced mileage. I woke up today around 6:00 today and was the first one up.  By the time I left the shelter at 7:30, the other 3 people who spent the night there had not left their sleeping bags.  The climb up Mt. Horrid was not as bad as it looks on the map, but it was still slow.  I decided that the trekking poles reduced my speed on ascents, so after Mt. Horrid, I stowed them while climbing and took them out for long and/or steep down hills.  On the way to Sucker brook shelter, I saw one solo day hiker with a dog, a group of two day hikers, and a group of 3 sobo LT hikers. After Sucker Brook shelter, I ascended Worth Mtn. and at the top, I replaced the moleskin on my right foot because it was coming off.  After Route 125 at Middlebury Gap, I made the ascent up Burnt Hill during which I passed a fellow LT nobo.  When I reached Boyce Shelter, it was closed, apparently because all of the posts that hold the shelter up were either leaning or tipped over completely.  I stopped only briefly at Boyce shelter and did not enter the building itself.  The climb to Skyline Shelter felt long and slow even though it was only 2 miles from Boyce.  I missed the two lookouts shown on the map before the trail to the lodge, but the view from the lodge is quite nice, so I don’t really mind. While I ate dinner on the front porch, a rabbit came down the trail and began eating the grass growing in the shelter clearing.  It certainly saw me but did not seem to care.


8/7/15
The other people in the shelter got up around 5:00 this morning and I got up around 6:00.  I left by 7:00 and made it to Emily Proctor Shelter around 8:00.  The hike to Cooley Glen was fairly flat with easy ascents and descents.  The flat sections were muddy, and after a few miles, I began noticing moose prints in the mud.  I also saw a rabbit sitting on a log.  As I approached, it ran into the bushes.  Cooley Glen was a typical LT shelter and the water source, which was down a side trail left much to be desired as it was shallow and didn’t have much flow. The trail after Cooley Glen was similar to the trail from Emily Proctor, but had a very impressive view at Sunset Ledge.  I stayed there for a while and moved on around 1:30.  The ascent to Battell shelter was steady and not very steep, so I made good time, arriving at 2:15.  After i arrived, I was extremely bored for an hour until my mom and brother showed up.  They are doing Abraham and Ellen tomorrow.  After I arrived, the campsite filled quickly as did the shelter, so I set up my tent for the first time on the trail.  This is by far the busiest campsite I have seen so far.  There are at least 5 groups of various sizes, and a few solo hikers.  There are 4 other LT nobos and no sobos.  One large group is sitting behind the shelter talking loudly at the moment.  Hopefully they will decide to disperse to their tents soon.


8/8/15
I got up around 6:30 this morning and packed my pack.  My mother made oatmeal and we headed out around 8:00.  We reached the summit of Mt. Abraham quickly and stayed there for a while.  We then at the plane crash that another person at Battell mentioned last night.  We continued to Lincoln Peak and split there.  I stopped at the various views on the way to Cutts peak, then took a break there, where my brother caught up to me again.  He said that my mother was not far behind, so I waited for her, then went on.  I stopped next at Orvis Lookout after passing several small groups of day hikers on the trail down from Ellen.  The hike from Orvis Lookout to Stark’s nest was uneventful and I stopped at Stark’s Nest, I stopped to refill water at the water barrel and to use the privy before heading to Theron Dean Shelter. The trail immediately before and after Theron Dean shelter was the roughest I have seen so far.  It had an array of ladders, steel rungs implanted in the rock, and slippery rocks.  I arrived at Appalachian Gap mentally battered after the tough descent, and much to my surprise, there were two GMC volunteers sitting at a table in the parking lot handing out trail magic.  They directed me to the location of the trail on the other side of the road and offered me a Snicker’s bar and a Kind bar, which I gratefully accepted. After a short but steep climb up Baby Stark Mtn. and a good view from Molly Stark’s Balcony, I trudged into Birch Glen.  After a short break there, I decided to go on to Cowles Cove Shelter.  I made excellent time to Cowles Cove and arrived around 4:00.  There were 2 LT nobos here when I arrived (Duck Stepper and Crockpot, collectively known as the Honeymoon Hikers), and a father and son headed south on a short section hike arrived later.


8/9/15
I left Cowles Cove Shelter around 7:30 this morning and headed up Burnt Rock Mountain, which has amazing views along a long stretch of open rocks.  I stayed at Burnt Rock Mtn. for a while and contemplated the possibility of camping on the open ledges on some later trip.  I then descended to Ladder Ravine.  The ladder is an aluminum ladder, perhaps 20 feet long, that is attached to a vertical rock face.  After Ladder Ravine, I ascended to the summits of Mt. Ira Allen and Mt. Ethan Allen and descended to Montclair Glen.  Montclair Glen is the site of recent bear issues and had a brand new bear box.  When I arrived, there was a GMC group stopping for a break on their way up Camel’s Hump.  We talked briefly and they gave me a handful of trail mix.  They started their ascent while I signed the trail register and refilled my water bottles.  I then headed up Camel’s Hump, passing the GMC group and several other small groups of day hikers on my way to the summit.  The summit was crowded with day hikers, but had great views.  I stayed a while and headed down when more day hikers began to show up.  The descent was long and I stopped at the various views.  When I reached Duxbury Rd. I realized that even though there is a new suspension bridge, there is still a long road walk, which was quite miserable.  The bridge was very impressive.  I met my mother there and we drove into Waterbury to our hotel (The Old Stagecoach Inn), took showers, and got dinner a restaurant down the street.  Later, we drove to Ben and Jerry’s and got icecream before returning to the hotel, where I finished packing the supplies from my resupply box.


8/10/15
We ate breakfast at 7:30 when it began.  I had a ham and cheese omelet, a sausage, and a piece of toast.  The late breakfast forced me to start late (8:30).  I did the short walk up Bolton Notch Rd. and headed up the new LT, which looked to be a mix of new and old trail.  I arrived at the spur leading to Buchanan Shelter around 12:00 and went down it for a little while looking for the shelter and water.  I found neither, so I went back along the LT a little and filled my water from a very small stream that I had passed.  I took a short break at the junction with the spur, then headed up Bolton Mtn.  It was a long, rough climb because of my heavy pack and the many miles of uphill hiking.  I took a short break at the top of Bolton Mtn. and then went down the half mile to Puffer Shelter, where two sobos informed me that there was a piped spring at Taylor Lodge and that there was no water at Puffer.  I continued down on a difficult descent to Taylor Lodge and considered moving on to Butler.  I arrived at Taylor Lodge around 3:45 and decided that it was too late to go to Butler.  I went down to the spring mentioned by the sobos and filled my water bottles and both Sawyer squeeze pouches so that I would not have to go back down.  Before I left to go to the spring, a large camp group of girls showed up.  They were initially tolerable, but have become increasingly loud.  I am beginning to regret my decision not to move on to Butler.


8/11/15
There was rain in the forecast for today, so I planned only to go to Butler Lodge.  I woke up at my usual time (around 6:00), packed my gear, and ate breakfast.  By the time I was almost ready to go, it had started to rain, so I waited a while, then put on my rain gear and headed up the trail.  My rain pants were sweaty and leaked slightly at the seams, but my raincoat, gore-tex socks, and pack cover were fine.  When I arrived at Butler, there were 3 people there, all still in their sleeping bags.  I took off my wet rain gear and hung it up to dry.  I then pulled out my map and LT guide to consider my itinerary for the remainder of the trip.  At 2:00, the rain started to let up and the other people in the shelter began to consider leaving.  I decided to leave with them thinking that the trail would only get wetter tomorrow.  Two others and I headed out around 2:30 and stayed together until a dangerous section, where one person turned back in favor of the bad weather bypass.  My self and the other hiker (Redrum, LT nobo) continued to the top of the forehead, where we split and I went ahead.  There were no views on Mansfield because it was in a cloud, but there was no rain or wind (or day hikers) either, so it was not nearly as bad as it could have been.  The descent from the chin was quite steep and slightly slippery, so I took it slow.  There are 7 others here excluding the caretaker.


8/12/15
Today I got up late and left late because it was raining and I had a shorter day.  I left around 8:30 and was the third to leave the shelter.  The hike down to Route 108 was steep at the beginning, and because it was wet, it went slowly.  I took a short break at the bottom to figure out where the trail went and to take off my rain pants.  I stopped at the picnic area to use the bathroom there as well.  The climb up to Elephant’s head cliff was hard and felt lik it took a long time.  Even the flat spots had many roots and small ups and downs, making them almost as slow as the steep sections.  When I arrived at the spur for the view point, there was a break in the clouds, so I took the advice of the Taft caretaker and went to the viewpoint.  The view was interesting with the low clouds, so I took a few pictures and ate my biscotti.  When I returned to the top of the viewpoint spur, I headed on  to Sterling Pond Shelter, where I signed the register and took a short break.  Next, I went up and over Madonna Peak and Morse Mountain to Whiteface Shelter.  The trail was very muddy in the flat spots and there were many roots, making this another slow section.  I stopped for a break at Whiteface shelter and it started to downpour.  I waited to see if it would stop for 10 minutes, then determined that I needed to move on.  I put on my rain coat and headed up Whiteface Mtn.  The trail was a stream and I trudged up the steep slope for about ten minutes before the rain stopped.  I tagged the summit, then took out my trekking poles and headed down since the only view was a cloud.  The descent to Bear Hollow was easily the wettest section of trail that I have ever had the misfortune of hiking on.  Nearly all of the steep section was enveloped in a stream, which did not seem to be abated by the occasional water bars, and all of the flatter section was continuous mud.  My trekking poles came in handy for pole vaulting the mud puddles.  My shoes still ended up completely saturated.  Thankfully, my Gore-Tex socks kept my feet and socks fairly dry, though water was beginning to seep through by the end of the day.  When I arrived at Bear Hollow, there were 4 other people here, and I was forced to take a top bunk.  There were a few small puddles on the top bunk, so I inferred that the roof leaked and got out my bivy.  I then cooked dinner (stuffing), filtered water, and organized my gear before getting ready to go to bed.


8/13/15
Because today was a 16 mile day, I got an earlier start.  I left the shelter around 7:30 and headed down the trail.  It was an easy hike, being mostly on dirt roads and old woods roads.  I reached the bottom of the hill, walked the rail trail section, and shoved through the dense brush leading up to Route 15.  I had been somewhat concerned that the secondary channel of the Lamoille River might be flooded after the rain, but when I arrived, it barely had a trickle running down it, so I crossed it and the bridge.  I took a short break at the bench on the far side of the bridge, then headed up to Prospect Rock.  The view from Prospect Rock was good, so I stopped there for another break.  From Prospect Rock, the trail to Round Top Shelter was uneventful.  I stopped at the shelter for another break and signed the register.  After Roundtop, I went down to Plot Rd. and up the hill immediately north of it.  On my way up, I saw many tubes running from tree to tree for collecting maple sap.   At the top of the hill, I saw some moose tracks.  There appeared to have been 2 moose traveling together south bound on the trail.  Later, I saw a few tracks heading north as well.  After reaching the bottom of the hill, I ate a Snickers bar and saw an impressively obese woman waddling down from Laraway Mtn. I climbed quickly up Laraway Mtn. and soon came to a stream crossing where I stopped to transfer water from my clean bottle to my drinking bottle.   I made the ascent up to Laraway Lookout very quickly and passed two families, both heading up.  I stayed at the lookout for a while, and saw two ravens flying a little ways away.  The ridge on Laraway Mtn. was as muddy as the Sterling Range yesterday and it was slow going.  The descent from Laraway Mtn. was not bad, but felt long.  I arrived at Corliss Camp around 2:20, set up my sleeping pad/ bag, got water, and set out my shoes and socks to dry.  My Gore-Tex socks still have not completely soaked through, but my socks were slightly damp from sweat.  There was no one here when I arrived, but 2 sobos have showed up since.


8/15/15 (morning, I forgot to write 8/14)
I started off yesterday a little after 7:00 and easily climbed Butternut Mtn.  I reached Bowen Mtn.  an hour later than I expected, however, and after looking at the map, realized that the two unmarked peaks north of the marked location for Bowen Mtn. were actually the North and South summits marked by signs on the trail.  After passing the North summit of Bowen Mtn. I descended to Spruce Ledge Shelter and spent some time at the lookout there.  I then passed through Devil’s Gulch, which was interesting with its many boulders and steep walls, but not all that amazing.  Ritterbush lookout was a good, but not great view and I stopped there only briefly to recover from the brutal rock staircase leading up to it.  The trail from Ritterbush Lookout to Eden Crossing was fairly easy.  The bottom part of the ascent up Belvidere Mtn. was fairly easy because it was a continuous steady incline, but the top part became steep in sections.  I stopped at the top of Belvidere and went up the Fire Tower.  The trail from Belvidere Mtn. was bushy and muddy, but otherwise unremarkable.  I stopped at Tillotson Camp for the night.  There was one sobo here when I arrived, and two nobos doing the northern half of the trail (Dollarcoin and Dante) showed up later having gone to Eden for a resupply.


8/15/15 (night)
I got up around 6:00 today as did the sobo thru-hiker.  I made breakfast and left around 7:30.  The climbs up Tillotson Peak and Haystack Mtn. were not bad, but the mud was terrible.  I slipped once early in the day (Before Tillotson Peak) and got my leg all muddy.  There was one small mud puddle so deep that I was able to submerge my trekking pole up to the first locking mechanism without reaching the bottom.  I did not take the spur to the summit of Haystack Mtn. because there was a cloud and thus, there would have been no views.  The section from Hazen’s notch to Jay Pass was not bad, but like everywhere else on the LT, it was very muddy.  I did not stop at Hazen’s notch camp, but did stop at Chet’s Lookout just north of the summit of Buchanan Mtn.  The view was obstructed by trees, but it was dry.  At Chet’s lookout, I concluded that I would have enough time to pass Jay Camp and find a spot to camp somewhere on Jay Peak so that I could get a good view of the sunrise.  When I reached Jay camp, I filled my water bottles in preparation for camping somewhere without water and headed up at around 3:00.  I arrived at the summit of Jay peak a little after 4:00.  I did not stay at the top long since there were tourists, but did go to the tram station to throw away my trash and use the bathroom.  I left the tram station a little after the last tram went down and hiked to the Uller’s Dream ski trail, where I found a good camp spot.  I decided to make dinner around 6:00 and found a large rock to cook on a little ways from my tent.  In the process of putting my pot on the pot stand, I accidently tipped over my stove, windscreen and pot, spilling 16 oz. of water and all of my remaining alcohol (I use an alcohol stove).  I considered my options, and not wanting to make a fire or eat cold mashed potatoes on my last night out, I remembered that I had far more olive oil than I needed.  Being a bit of a stove/ fire nerd, I have always had an interest in oil lamps, so I decided that this was a good opportunity to try it out.  I poured some olive oil into my alcohol stove and tried to light it.  As I expected, this did not work, so I looked through my gear for something to use as a wick.  I finally settled on a thin strip of moleskin folded over on itself.  I propped the moleskin wick against a small rock that I placed in the stove and lit it.  This burned with a small but steady flame.  I set up my pot stand and windscreen again, measured out another 2 cups of water, poured the water into my pot, and placed the pot on the pot stand, this time very carefully.  After nearly an hour, the water became hot enough to make a hot meal and I poured in a package of instant mashed potatoes (because of their quick rehydrating times).  Those mashed potatoes were the best I ate on the trail.  I will get up early tomorrow in the hope of catching the sunrise, sit around in camp for a while, then leave fairly late.


8/16/15
I got up this morning around 5:30 hoping to catch the sunrise, however my campsite was in a cloud, so I stayed in my sleeping bag until around 6:00 when the clouds began to clear. I ate breakfast and once the clouds had cleared , I got out and took many pictures.  Hopefully some of them came out well. Because of the condensation from the cloud, my tent was wet on the inside and outside, so I packed it last in the hope that it would dry out a little in the sun.  It did not and I ended up packing it wet.  The descent to Laura Woodward shelter was steep and slippery and I slipped once, thankfully landing on my pack and not the rocks.  At Laura Woodward shelter, I stopped to fill my water bottles and to sign the register.  I used a hobblebush leaf to make a spout to fill my Sawyer Squeeze bags at the water source. The ascent and descent of Doll Peak was wet and slippery, however after that the trail leveled off and the mud reduced.  I was able to pick up the pace for the first time in a few days.  At Shooting Star Shelter, I stopped for a break and received a text from my mother saying that she would meet me at the northern terminus between 1:30 and 2:00.  This was an hour earlier than I expected, so I left Shooting Star Shelter earlier than I planned.  The remainder of the day went by quickly because the trails were in good shape and had little mud.  I did not stop long at either of the viewpoints shown on the map because there were too many trees to seem much.  I arrived at the northern terminus at about 1:20, and to my surprise, found my mother already there.  She had brought me an apple, 2 cookies, a LT T-shirt, and a LT/GMC patch.  We sat on the rock outcrop jutting into the border strip next to the line post while I ate the food, then started the walk out on the Journey’s End Trail.  We stopped briefly at Journey’s End Camp and I signed the register.  When we arrived at the parking lot, two men were there preparing to start a thru-hike.  They took pictures with the couple who had given them a ride to the trailhead and we were forced to wait because we were parked in.  After they finished taking pictures, their ride headed out and so did we.  My mother had reserved a hotel room at Jay Resort, so we went there and took showers before going out for dinner at the Belfry Restaurant, where I got a chicken pesto sandwich, which was delicious.  It is always nice to eat meat after being on the trail.  It is strange to be finished with the LT after planning to do it for many months and hiking it for a little under 3 weeks.  I am happy for my achievement, but would prefer to be back on the trail again, no matter how steep, slippery, muddy, and overgrown it might be.
Final Gear List:

  • Osprey Exos 48 pack
  • Sea to Summit Ultralight air mattress
  • Marmot Sleeping bag (some discontinued model)
  • Mountain Laurel Designs Superlight Bivy
  • Z-Packs Hexamid Solo Tarp (white)
  • REI Motility Rain Jacket
  • Red Ledge rain pants
  • Rocky Gore-Tex Socks
  • Sea to Summit Pack Cover
  • Sawyer Squeeze Water Filter, Sawyer Squeeze Bags, and cleaning syringe
  • 1 Liter Nalgene water bottle
  • 1 Liter disposable bottle
  • Smart Wool Socks (2 pairs)
  • Columbia Hiking Shoes (some discontinued model, unfortunately)
  • Dirty Girl Gaiters
  • REI Zipoff pants
  • Smart Wool T-shirt
  • Ursack S29 AllWhite bear bag(2x)
  • thin Champion Gear gloves (no idea what model)
  • Evernew Titanium Pot
  • Home-made alcohol stove, windscreen, and pot stand
  • Light My Fire fire-steel (for lighting stove)
  • REI Campware Soup Spoon
  • Black Diamond Approach Trekking Poles
  • Granite Gear xs compression sack
  • foam seat pad
  • Toob Toothbrush
  • Ear Plugs (4x)
  • Pillow Stuff Sack (stuff sack with fleece sewn onto it)
  • Under Armour Fleece hat
  • extra shirt (not sure what brand)
  • Victorinox Signature Lite
  • Camera and case
  • Princeton Tec Byte headlamp
  • dental floss
  • Skin Glide Anti-friction Balm
  • Small Sea to Summit waterproof bag (for phone)
  • Sea  to Summit waterproof bag (emergency bag)
    • Moleskin, Ace Bandage, Tape, Matches and Match Case, various bandages/ bandaids, Advil, compass, safety pins, cuben fiber tape, duct tape, air mattress patch kit, sewing needle and thread, Z- cord (replacement tent lines), Benadryl
  • Toilet paper and hand sanitizer
  • Sea to Summit Pack Liner